Chicken Orzo Recipe – Delicious & Easy One-Pan Dinner
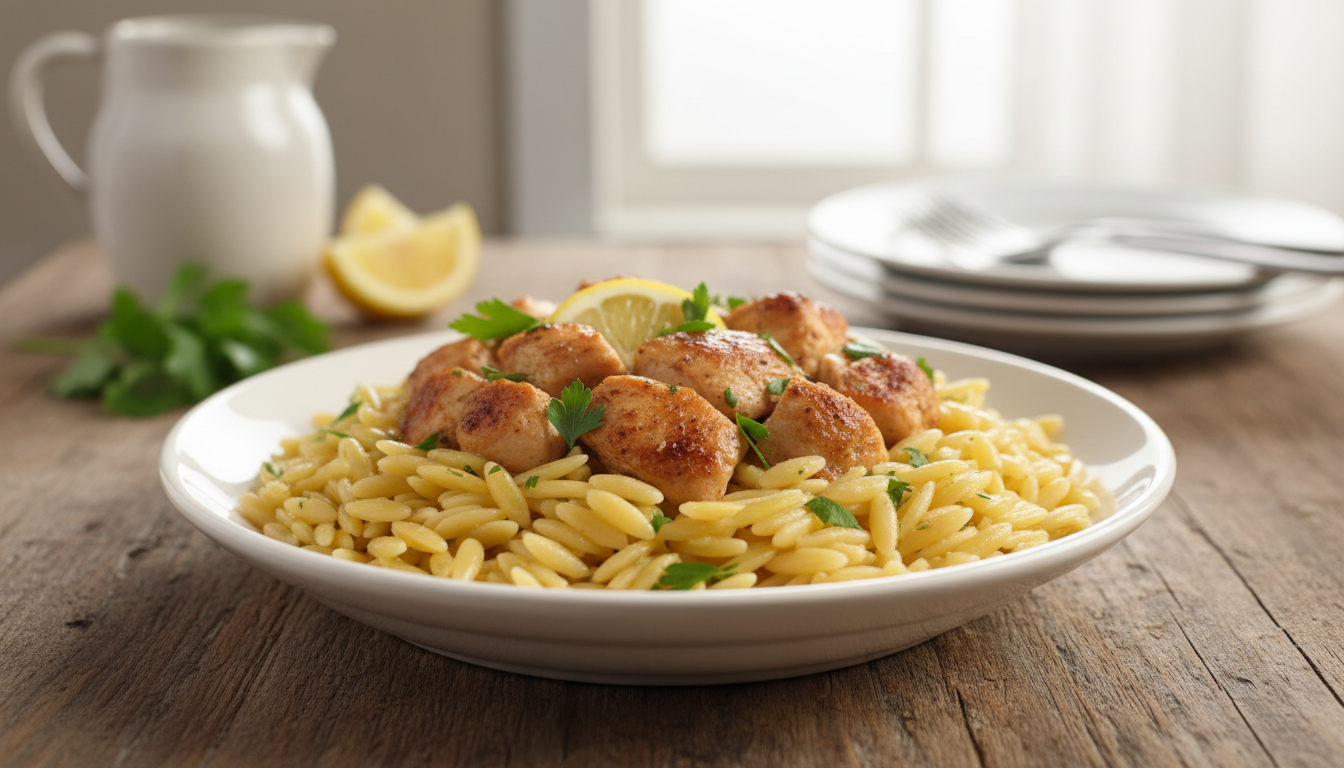
Chicken orzo recipe lovers know the feeling: the clock ticks toward dinner and you want something warm, fast, and satisfying. This one-pan, weeknight-friendly dish answers that craving with Italian-inspired flavor and minimal fuss. It brings tender chicken, saucy burst tomatoes, garlic, Parmesan, spinach, and basil together in about 30 minutes for a comforting meal the whole family will enjoy.
When you cook the pasta right in the skillet, it soaks up the broth and becomes creamy without a second pot. That means less cleanup and more time to sit down with the people you care about.
Expect a full recipe card below with ingredients, step-by-step instructions, prep time, cook time, total time, servings, and nutrition so you can jump straight to cooking when you’re ready.
Table of Contents
Whether you crave comfort on a busy night or want a simple, flavorful dinner that feels homemade, this chicken orzo dish delivers. Garlic, broth, basil, and Parmesan are the main drivers of the flavor profile you’ll taste from the first bite.
Why You’ll Love This One-Pan Chicken and Orzo Dinner
Quick, flexible, and deeply flavorful — that’s the promise. You brown the protein first, then add broth and pasta to simmer covered for about 12–14 minutes. In total, you can realistically have dinner ready in roughly 30 minutes.
One skillet or a Dutch oven makes weeknights easier. Fewer dishes, fewer steps, and those fond bits from browning stay in the pan to build the sauce. Use a deep skillet or a Dutch oven with a tight lid so the simmer stays steady and the pasta cooks evenly.
Want to change the vibe? Keep it brothy, stir in cream or cream cheese for a silky finish, add lemon for brightness, or toss in tomatoes for a tomato-forward version. This is a repeatable meal template you’ll return to.
Why it feels like comfort food: pasta-like grains, browned protein, and Parmesan give the same cozy payoff as baked pasta but in far fewer minutes. Later sections show the creamy, lemon, and sun-dried tomato variations so you can customize every week.
What Is Orzo Pasta and Why It Works So Well Here
Think of orzo as a tiny pasta grain that gives you rice-like texture and fast cooking in a single skillet. It’s actually a short, rice-shaped pasta that handles liquid differently than long noodles. That means you can buy it in the pasta aisle and expect quick, even cooking.
Toasting the grain before you add liquid makes a real difference. A quick toast in oil browns the edges, seals in flavor, and gives the finished dish a deeper, nuttier note. It’s a small step that makes the meal feel more restaurant-style.
The best part is you don’t need to boil and drain separately. Add the orzo pasta straight into the skillet with hot broth and simmer. As it cooks, the starch releases and naturally thickens the broth into a cohesive sauce.
- Texture payoff: eats like rice, tastes like pasta.
- Toasting tip: 1–2 minutes over medium heat until fragrant.
- Doneness check: stir and taste for al dente; it softens fast.
Ingredients Spotlight: Chicken, Broth, Garlic, and Parmesan
Choosing the best cuts and pantry staples sets this skillet dish up for success in minutes. Start by picking boneless, skinless chicken breast for lean, quick-cooking cubes or thighs if you want extra richness and forgiving texture.
Broth matters: use low-sodium chicken broth so you can adjust salt as the liquid reduces. That control prevents an overly salty finish and keeps the sauce balanced.
Shallot and lots of garlic form the fast foundation flavors. Sauté them briefly until fragrant to build depth so the whole pan tastes like it simmered longer.
Parmesan cheese finishes the dish. Freshly grated parmesan cheese melts smoother and adds a nutty, savory note that thickens the sauce without heavy cream.
- Season with Italian seasoning, paprika, salt, and black pepper to reinforce the Italian-inspired profile.
- Pick either chicken breast or thighs to match your texture preference.
- Always check labels on broth and cheese—salt levels vary widely across brands in the United States.
Equipment You’ll Need for a Skillet Chicken Orzo
Right cookware makes the process smoother. Pick a large, high-sided skillet or a heavy pot with a tight-fitting lid so the grain can expand and the simmer stays controlled.
The high sides matter because the simmer can bubble up. A shallow pan risks splatter and uneven cooking. You want room for broth to reduce without spilling.
Deep skillet vs. Dutch oven
A heavy-bottomed pot or Dutch oven spreads heat evenly and reduces hot spots that scorch pasta. If you only have a shallow pan, watch the heat and stir more often.
Tools that prevent sticking
Use a wooden spoon or a heat-safe spatula to scrape the bottom as the grain simmers. Frequent stirring near the end prevents sticking and lets you check doneness.
- High sides: allow expansion and reduce splatter.
- Tight lid: helps the orzo cook through and keeps broth from evaporating too fast.
- Best stirring tool: wooden spoon or heat-safe spatula for scraping.
- Heavy-bottomed pot: more forgiving, distributes heat, and lowers scorch risk.
- Quick tip: keep a measuring cup nearby to add small splashes of broth if the mixture tightens before the grain is tender.
Prep Tips to Make This Recipe Fast on Busy Nights
Little setup tasks before you turn on the stove save major time and stress later. Do a quick staging of your ingredients so the whole cook flows without stops.
Cutting the protein for even cooking
Cut the chicken into evenly sized 1-inch pieces so everything finishes at the same pace. Uniform pieces brown and stay tender.
Lay the cut pieces on a plate and season lightly. When it’s time to add chicken back, having it ready prevents overcooking.
Prep aromatics, greens, and measurements
Prep aromatics first. Mince garlic with a microplane or use a garlic press for the fastest, most even flavor. Chop shallot or onion before the pan gets hot so garlic never burns.
Coarsely chop spinach and thinly slice basil so you can stir them in at the end for fresh brightness. Measure seasonings and broth ahead so you can move from browning to simmering without delays.
“A few minutes of prep is the difference between rushed cooking and a calm dinner service.”
- Tip: Mise en place—small bowls for measured ingredients speeds every step.
- Tip: Use a microplane for fast garlic prep and a plate to hold cut chicken ready to add.
How to Cook Chicken Without Drying It Out
A truly hot skillet and a film of oil are the quickest route to golden, flavorful searing. Preheat the pan until it’s hot, then add enough oil to coat the surface. This helps the pieces brown fast and spend less time over heat.
Using oil and the right heat for golden-brown results
Work over medium-high heat so the exterior caramelizes without steaming. Add small batches so the pan stays hot and you get a deep color in a short time.
When to pull the pieces from the pan and why it matters
Cook small pieces about 4–6 minutes until edges are golden and centers are no longer translucent, then move them to a plate. Removing them stops direct heat exposure and preserves juiciness.
- Stir occasionally rather than constantly to develop color.
- Use visual cues: crisp edges and opaque centers.
- Carryover warmth finishes doneness off the heat.
- Thighs bring extra fat and are more forgiving; breasts need closer attention.
| Step | Goal | Timing |
|---|---|---|
| Preheat pan | Hot surface for sear | 1–2 minutes |
| Sear in oil | Golden color, flavor | 2–4 minutes per side |
| Rest on plate | Prevent overcooking | While you build the sauce |
Building Flavor in One Pan: Aromatics, Tomatoes, and Seasonings
Start by softening shallot in the hot pan after you remove the seared protein. Sweat it in the remaining oil over medium heat until translucent and slightly sweet.
Lower the heat before you add garlic. Add garlic and the seasoning blend—Italian seasoning, paprika, a pinch of salt, and freshly ground black pepper—and stir constantly. Cook the garlic about 30 seconds until fragrant so it brightens the pan without turning bitter.
Next, add halved cherry tomatoes. As they warm, they will soften and burst, creating a quick, natural sauce that bonds with the grain during the simmer. This avoids the need for jarred sauce and keeps the finish fresh.
Season in layers: a little salt and pepper early builds depth, then taste and adjust at the end. These aromatics and ripe tomatoes are what make the final dish taste bold, even when you move fast on a weeknight.
| Step | What to do | Why it matters |
|---|---|---|
| Sauté shallot | Medium heat, sweat until translucent | Adds sweet, mellow base |
| Add garlic & seasonings | Lower heat, stir constantly ~30 sec | Prevents bitterness; builds savory backbone |
| Cook cherry tomatoes | Simmer until they burst | Creates a fresh, quick sauce |
| Finish seasoning | Taste and adjust salt & pepper | Balances flavors for the final dish |
Getting the Orzo Perfect: Toast, Simmer, Stir
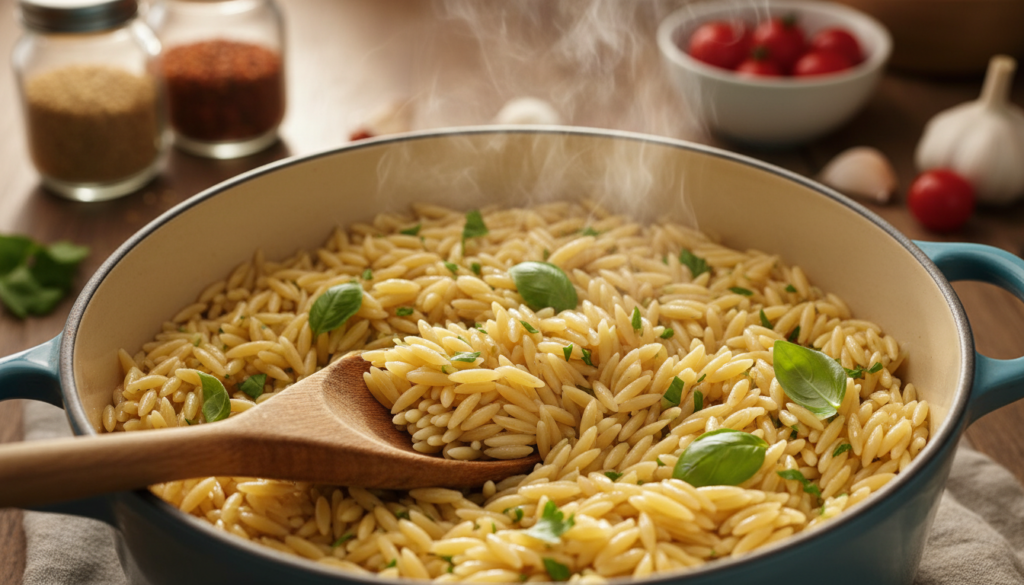
Get the grain to a light golden toast before you add liquid—this seals flavor fast. Toast for about a minute with tomatoes and seasonings so the kernels pick up oil and fragrance without burning.
How long to toast
Keep the heat medium-high and watch closely. One minute is usually enough to brown edges and lift aroma.
Broth-to-orzo ratio and adding liquid
Start with roughly 3–4 cups of broth for a typical pan. Add just enough to cover, bring to a gentle boil, then lower the heat and cover the pot to simmer.
If the pan absorbs liquid too fast, add small splashes of broth rather than a large pour to control texture.
Prevent sticking and telltale “al dente”
Stir often and scrape the bottom with a wooden spoon, especially in the last few minutes when starch thickens.
Cook covered about 12–14 minutes until tender but still slightly firm in the center — that’s al dente.
| Action | Timing | Why |
|---|---|---|
| Toast | ~1 minute | Builds flavor |
| Simmer covered | 12–14 minutes | Even cooking in the pot |
| Stir & scrape | Frequent near end | Prevents sticking |
Finishing Touches That Make the Dish Pop
A careful finish makes the sauce glossy and the greens vibrant. Lower the heat before you add the Parmesan so it melts smoothly and the sauce binds without clumping. Stir the cheese in first to build a cohesive, silky finish.
Once the cheese melts, fold in the spinach and let it wilt for about one minutes. This keeps the leaves bright and prevents a waterlogged pan.
Add torn basil and a pinch of red pepper flakes for brightness and gentle heat. Return the cooked chicken to the skillet so it warms through without overcooking.
- Order: cheese, then greens, then herbs and heat.
- Brothiness tip: if the mix looks tight, add a splash of broth and stir until glossy.
- Finish: taste and adjust salt and pepper last.
“Finish simply: gentle heat, a final stir, and you’ve got a saucy, balanced dish.”
| Finish Step | Why | Timing |
|---|---|---|
| Add Parmesan | Creates silky sauce | 30–60 seconds |
| Wilt spinach | Keeps color and texture | ~1 minute |
| Return protein | Warm without overcooking | Just to heat through |
Creamy Chicken Orzo Options (Without Making It Heavy)
Small amounts of high‑fat ingredients give big creaminess without weighing the dish down. You can pick a classic dairy route or a dairy-free substitute to suit your plate and guests.
Heavy cream vs. full‑fat coconut milk
Use heavy cream for a rich, silky finish. For a dairy-free alternative, full‑fat coconut milk gives body with a hint of sweetness. Add just 2–4 tablespoons near the end so the sauce stays light.
Cream cheese trick
Stir in about 2 ounces of cream cheese on low heat. Melt it slowly so it blends with the orzo starch and Parmesan for a restaurant-style texture without pouring in cups of cream.
- Add Parmesan gradually until the sauce looks glossy and coats the grain.
- Use small amounts of cream or coconut milk to avoid heaviness.
- Higher‑fat additions can tighten as they cool—thin with a splash of broth when reheating.
| Option | Amount | Why |
|---|---|---|
| Heavy cream | 2–4 tbsp | Classic richness |
| Coconut milk | 2–4 tbsp | Dairy‑free silkiness |
| Cream cheese | ~2 oz | Thickens without heavy pours |
Flavor Variations Inspired by Popular Chicken Orzo Recipes
Small tweaks transform this one-pan dinner into three distinct directions: tomato-rich, bright citrus, or fast comfort. Each variation follows your base method so you keep the same quick workflow and cleanup.
“Marry Me” with sun-dried tomatoes: After the aromatics, stir in drained sun-dried tomatoes packed in oil. Simmer the grain as usual, then finish with a splash of heavy cream or coconut milk, spinach, and grated Parmesan for a rich, silky finish.
Lemon bright version: Sauté lemon zest and garlic briefly in oil, toast the grain, and simmer in broth. Melt in cream cheese, finish with fresh lemon juice and Parmesan, and you’ll have a bright dinner in about 15 minutes.
Speed option — rotisserie meat: Use shredded rotisserie chicken to save time and avoid dryness. Stir it in at the end just to warm through.
- If you’re short on time, a pinch of garlic powder helps boost the garlic flavor.
- Pick cozy creamy for comfort, lemony for freshness, or tomato-forward for boldness—none change the one-pan approach.
What to Serve with Chicken and Orzo
Pair this skillet with a few simple sides to turn a quick pan dinner into a fuller table. Pick options that finish fast so the whole meal comes together without extra fuss.
Easy sides that match the weeknight theme
- Garlic bread: Warm in the oven while the grain simmers so it’s hot at the table.
- Steamed green beans: Quick to cook and they add a crisp contrast to the rich Parmesan.
- Sautéed zucchini: Toss slices in the same pan or a separate skillet for a fast, tender side.
- Simple arugula salad: Lemon vinaigrette brightens the plate and keeps prep minimal.
Ways to stretch the meal and plan servings
Stretch strategies: stir extra spinach into the pan, add more broth for a looser texture, or serve smaller portions with hearty sides to increase servings.
| Side | Why it works | Finish time |
|---|---|---|
| Garlic bread | Adds crunch and soaks sauce | 8–10 min in the oven |
| Green beans | Balances richness with fresh bite | 5–7 min steamed |
| Arugula salad | Brightens and lightens the plate | 2–3 min to toss |
Planning tip: choose sides that don’t need another burner so you keep the kitchen workflow simple and everything finishes at once.
Chicken Orzo Recipe (Full Recipe Card)
Below is the complete, print-friendly card with exact amounts, timings, and easy steps to follow at the stove.
Times & Servings
Prep time: 10 minutes. Cook time: 20–25 minutes. Total time: 30–35 minutes. Serves: 4.
Ingredients
- 2 tbsp olive oil
- 1 1/2 lb boneless skinless chicken, cut into 1″ pieces
- 1 tsp Italian seasoning, 1/2 tsp paprika, kosher salt, black pepper
- 1 diced shallot
- 6 minced garlic cloves (≈2 tbsp)
- 8 oz orzo (≈1 1/4 cups)
- 1 pint cherry tomatoes, halved
- 3–4 cups low-sodium chicken broth
- 3 oz baby spinach (≈3 cups)
- 1/4 tsp red pepper flakes
- 3/4 cup grated Parmesan, plus more for serving
- 1/4 cup sliced basil
Step-by-step Instructions
- Heat 2 tbsp oil in a large skillet over medium-high. Season the chicken and brown 4–6 minutes until edges are golden; remove to a plate.
- Sauté shallot ~3 minutes, lower heat, add garlic ~30 seconds. Add orzo and tomatoes; toast 1 minute.
- Pour in 3–4 cups broth to just cover. Bring to a gentle boil, reduce heat, cover, and simmer 12–14 minutes. Stir and scrape bottom often to prevent sticking.
- Lower heat; stir in Parmesan until glossy, add spinach and wilt ~1 minute. Stir in basil and red pepper flakes, then return chicken to warm through.
Nutrition (per serving, 1 of 4)
| Calories | Carbs | Protein | Fat | Sodium |
|---|---|---|---|---|
| 618 kcal | 56 g | 55 g | 19 g (sat 5 g) | Varies by broth/cheese |
Print-friendly note: Follow steps in order and keep the pan covered during simmer. Have broth measured and cheese grated before you start for smooth, fast cooking.
How to Store, Reheat, and Freeze Leftovers
Treat cooked grain like risotto: it firms up as it cools and needs a little liquid to revive. Cool the pan briefly, then transfer portions into an airtight container and place them in the refrigerator within two hours.
Refrigerator storage
Seal leftovers in a clean container and refrigerate for up to 3 days. Label with the date so you know when to use it.
Microwave reheating
Reheat in the microwave in short intervals. Stir between rounds and add a splash of broth to loosen the sauce and restore creaminess.
Skillet or pot reheating
Warm gently over medium-low in a nonstick skillet or small pot. Stir often, adding small splashes of broth until the texture is saucy again. This prevents overcooking and keeps the grain tender.
Freezing and thawing
Portion into freezer-safe containers or bags, squeeze out excess air, label, and freeze up to 3 months. Thaw overnight in the refrigerator before reheating.
“A little liquid and low heat bring leftovers back to life — patience beats high heat every time.”
| Storage | Where | Time | Best reheat |
|---|---|---|---|
| Short-term | airtight container in refrigerator | up to 3 days | microwave or skillet + splash of broth |
| Long-term | freezer-safe container or bag | up to 3 months | thaw overnight in refrigerator, then skillet |
| Tip | label & portion | – | use low heat to prevent mushy texture |
Troubleshooting: Fix Common Issues Fast
A few targeted fixes will bring your pan back to perfect in minutes. Use these quick checks near the end of cooking so you can correct texture and flavor without starting over.
If the grain looks dry: add small splashes of broth and stir until the sauce loosens and turns glossy. Do this a little at a time so you don’t over‑liquefy the pan. Keep the heat low and scrape the bottom as you go.
If it’s overcooked and mushy: prevent this by using a steady simmer, not a hard boil. Start checking 2–3 minutes before the suggested time and stop when the center is slightly firm; carryover heat will finish it.
If the sauce tastes flat: brighten it with a smashed clove of garlic or a pinch of garlic powder, a generous sprinkle of parmesan, a squeeze of lemon, and a final pinch of salt and pepper. Taste after each addition.
If it’s too salty: dilute with more unsalted broth and bulk up the pan with extra spinach or halved tomatoes to absorb and rebalance sodium without adding salt.
Warning sign — sticking or burning: if you hear aggressive sizzling instead of a gentle simmer, the pan is too dry. Reduce the heat, add broth immediately, and stir to prevent scorch.
- Quick mindset: these are end‑of‑cook tweaks, not restarts — small changes go a long way.
- Final taste check: adjust salt and pepper last after any looseners or brightenings.
| Problem | Quick Fix | Why it works |
|---|---|---|
| Dry pan | Add 2–4 splashes broth, stir until glossy | Restores sauce consistency and prevents sticking |
| Mushy grain | Stop early; serve slightly firm | Carryover heat softens without overcooking |
| Flat flavor | Add garlic, parmesan, lemon, salt/pepper | Builds savory, bright notes instantly |
| Too salty | Loosen with broth; add unsalted veggies | Dilutes sodium and balances taste |
Conclusion
Finish strong: simple technique choices make the difference between good and great. This one‑pan approach gives big flavor with minimal cleanup. The tiny pasta soaks up broth and becomes a silky sauce that carries garlic, parmesan, and herbs.
Make sure you brown the chicken, toast the orzo, keep a steady simmer, and stir and scrape the bottom near the end to prevent sticking. Use breast or thighs, low‑sodium chicken broth, and whatever greens or herbs you have on hand.
Try the creamy chicken orzo, lemon bright version, or a sun‑dried tomato twist to keep this dish in rotation. Serve straight from the skillet with a salad or oven‑warmed garlic bread. Leftovers reheat with a splash of broth, and portions freeze well for busy nights. Spinach and tomatoes add vitamins and fiber while portion control and cheese amount help manage fat.