How Long to Simmer Chicken Stock: The Perfect Time Guide
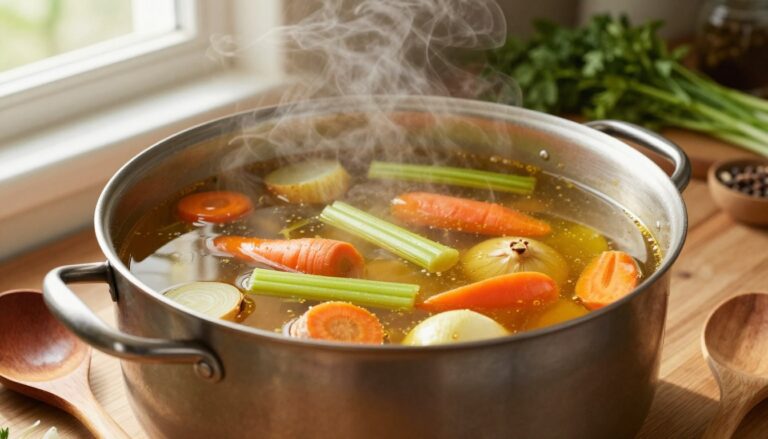
Every home cook has that moment when they realize store-bought broth just doesn’t cut it. It’s when they’re standing over a pot, watching steam rise from golden liquid. This liquid smells like comfort and possibility.
This simple act of patience turns raw bones and vegetables into liquid gold. It’s a moment of transformation.
The chicken stock cooking duration is key in your kitchen. Get it right, and you unlock rich flavors. These flavors elevate soups, sauces, and braises to restaurant quality. Miss the mark, and you’re left with weak, watery broth.
Understanding how long to simmer chicken stock is more than just following a timer. It’s about the science behind what happens in your pot. When you simmer bones and vegetables at the right temperature for the right time, gelatin releases from the bones.
This gelatin gives your stock body and a luxurious mouthfeel. It’s what separates good broth from exceptional broth.
Simmering for too short a time leaves you wanting more flavor and nutrition. Simmering for too long makes your stock bitter and cloudy. The sweet spot balances flavor extraction with the development of that beautiful golden color and silky texture.
In this article, you’ll learn the science-backed timing guidelines for the chicken stock cooking duration. You’ll discover which factors change how long your stock needs to simmer. You’ll master the techniques that separate mediocre broth from exceptional stock that you’ll be proud to serve.
Mastering how long to simmer chicken stock is a foundational skill. It elevates your entire cooking game. This investment of your time and attention pays dividends in every dish you create.
Table of Contents
The Foundation of Flavorful Chicken Stock
Making great chicken stock starts with cooking bones in water. The time you simmer the chicken stock is key. It turns simple ingredients into a rich, flavorful liquid. Science, technique, and quality ingredients work together to add depth and body to every spoonful.
Understanding the Science Behind Simmering
When you simmer chicken broth for the right time, collagen in the bones turns into gelatin. This gelatin makes your stock silky and satisfying. The best temperature is between 180-200°F (82-93°C), where gentle bubbles occasionally rise without boiling.
This controlled heat extracts flavors, minerals, and proteins from the bones. At these temperatures, you avoid cloudiness, making your stock clearer and more refined. The simmering time also lets flavors from roasted bones spread, adding complex, savory depth to your dishes.
Key Ingredients for Rich, Homemade Stock
Creating exceptional stock needs specific ingredients working together:
- Chicken bones (a mix of backs, necks, and feet for maximum gelatin)
- Aromatic vegetables (onions, carrots, celery)
- Fresh herbs (parsley, thyme, bay leaves)
- Peppercorns for subtle spice
- Cold water for gradual protein extraction
Starting with cold water is essential. Cold water helps proteins dissolve gradually, avoiding heat shock. The ratio of bones to water is also important—use about 3-4 pounds of bones per gallon of water for the best results.
| Ingredient | Amount | Purpose |
|---|---|---|
| Chicken bones (mixed) | 3-4 pounds | Creates gelatin and body |
| Water | 1 gallon | Base liquid for stock |
| Yellow onion | 1 large | Adds sweetness and depth |
| Carrots | 2-3 medium | Contributes natural sweetness |
| Celery | 2-3 stalks | Provides savory notes |
| Fresh thyme | 3-4 sprigs | Adds earthy flavor |
| Bay leaves | 2 | Enhances complexity |
| Black peppercorns | 1 tablespoon | Adds subtle spice |
Knowing these basics helps you make better stock. Quality ingredients and the right simmer time are key. They create the foundation for superior soups, sauces, and dishes.
How Long to Simmer Chicken Stock
Timing is key for making great chicken stock at home. The best simmer time for chicken stock varies based on your goals. Chicken bones are smaller and more porous than beef bones. They release flavor faster, so your simmering period is shorter.
Here’s what you need to know about timing your stock:
- 2 to 3 hours: Creates a light, delicate stock perfect for Asian-style soups where you want subtle chicken flavor
- 3 to 4 hours: Delivers the best simmer time for chicken stock that balances rich flavor with practical home cooking
- 6 to 8 hours: Produces a concentrated, deeply flavorful stock with maximum gelatin content
- 12 hours or more: Results in bone broth with exceptional nutritional density and collagen conversion

Knowing the stages of simmering helps you pick the right time. The first hour extracts most of the meat flavor. By hour two to three, vegetables release their aromas. From three to six hours, you get the most collagen and minerals.
Check if your stock is done by looking at the bones and liquid. The bones should be soft and crumbly. The liquid should be golden and smell great. When chilled, the stock should jiggle, showing it’s rich in gelatin.
Your schedule and cooking goals decide the best simmer time. Choose shorter times for quick meals or lighter flavors. Longer times are best for dishes needing more nutrition and flavor.
Factors That Influence Simmering Time
The right chicken stock simmer time varies for everyone. It depends on several things you can change. Knowing these helps you make stock that fits your needs perfectly.
Whether you’re using different bones or aiming for certain flavors, you can adjust. This way, you get the best results.
Bone Type and Size Considerations
The bones you pick greatly affect simmer time. Chicken feet and wings have lots of collagen and cartilage. They break down fast, needing only 2-3 hours.
Larger bones like leg and thigh bones take longer. They need more time to release all their flavor and nutrients.
Whole chicken carcasses with big bones simmer best for 4-6 hours. Cutting bones before simmering exposes more surface area. This speeds up flavor extraction without losing quality, a trick chefs use often.
The chicken’s age also matters. Older hens make stock that’s more flavorful and gelatin-rich. They might need a bit longer simmering, but the result is richer.
| Bone Type | Size Category | Recommended Simmer Time | Best For |
|---|---|---|---|
| Chicken Feet | Small | 2-3 hours | Quick stocks, gelatin-rich broths |
| Wings | Small to Medium | 3-4 hours | Light, delicate stocks |
| Leg and Thigh Bones | Medium to Large | 4-6 hours | Full-flavored, versatile stocks |
| Whole Carcass | Large | 5-8 hours | Deep, concentrated stocks |
| Cut/Broken Bones | All Sizes | Reduce by 25-30% | Faster extraction without quality loss |
Desired Flavor Intensity and Concentration
The use of your stock affects simmer time. For demi-glace or concentrated sauce, simmer for 6-8 hours. This makes a richer base for complex dishes.
For everyday soup stock, 3-4 hours is enough. This way, your other ingredients won’t be overpowered by the stock’s strength.
Remember, there’s a point of diminishing returns. After 8 hours with chicken bones, you’ve gotten most of the flavors and nutrients. Longer simmering can introduce off-flavors or bitterness.
- Light stocks: 2-3 hours for delicate dishes
- Standard stocks: 4-6 hours for versatile use
- Deep stocks: 6-8 hours for concentrated sauces
- Never exceed 8-10 hours with chicken bones
Understanding these factors lets you control your cooking. You can adjust based on the bones and the results you want.
Step-by-Step Guide to Making Perfect Chicken Stock
Learning to simmer chicken stock can change your cooking. It makes a great base for soups, sauces, and gravies. This guide will help you succeed in your kitchen. Follow each step carefully, from prep to storage.
| Element | Details |
|---|---|
| Prep Time | 15 minutes |
| Cooking Time | 3-4 hours |
| Yield | Approximately 3 quarts (12 servings) |
| Serving Size | 1 cup per serving |
Start by gathering your ingredients. You’ll need 3 to 4 pounds of chicken bones, 1 large onion, 2 medium carrots, 2 celery stalks, 4 cloves of garlic, 2 bay leaves, 4 to 5 fresh thyme sprigs, 6 to 8 parsley stems, 1 teaspoon of black peppercorns, and 4 to 5 quarts of cold water.
The Complete Recipe Process
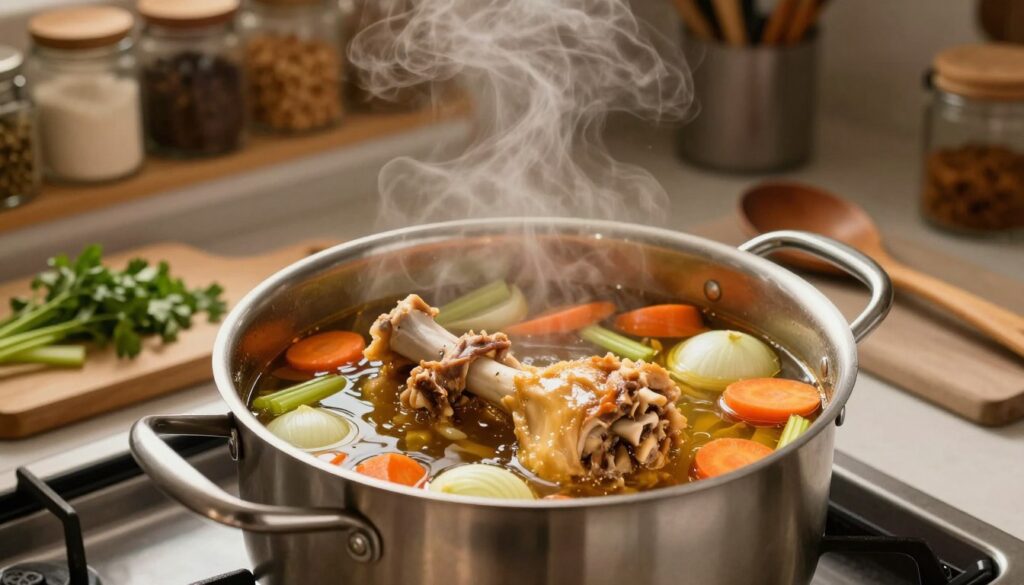
Begin by placing chicken bones in a large stockpot. Cover them with cold water by 2 inches. Bring the water to a bare simmer over medium-high heat. This takes about 20 to 30 minutes. Once simmering, reduce the heat to low.
For the first 30 minutes, skim off the foam and gray impurities. This makes your stock clearer and cleaner-tasting. Once it’s clear, add your vegetables, herbs, and peppercorns.
- Place bones in stockpot and cover with cold water by 2 inches
- Bring to bare simmer over medium-high heat (20-30 minutes)
- Reduce heat to low immediately upon reaching simmer
- Skim foam and impurities for the first 30 minutes
- Add vegetables, bay leaves, thyme, parsley, and peppercorns
- Maintain gentle simmer with a few bubbles for 3-4 hours
- Add water if level drops below the bones
- Strain through fine-mesh strainer lined with cheesecloth
- Cool rapidly using an ice bath
- Refrigerate overnight and remove solidified fat layer
The secret to great chicken stock is a gentle simmer. Keep the heat low to extract flavor and minerals without cloudiness. Simmer for 3 to 4 hours.
Nutrition and Storage Information
Each 1-cup serving has about 40 calories, 2 grams of fat, 1 gram of carbs, and 5 grams of protein. Unsalted stock has about 450 milligrams of sodium. It also has calcium, magnesium, and phosphorus for bone and joint health.
| Nutrition Per Cup | Amount |
|---|---|
| Calories | 40 |
| Total Fat | 2g |
| Carbohydrates | 1g |
| Protein | 5g |
| Sodium | 450mg (unsalted) |
| Calcium | High |
| Magnesium | High |
| Phosphorus | High |
Expert Tips for Best Results
- Roast bones at 400°F for 30 minutes before simmering for deeper color and richer flavor
- Never add salt during cooking so you can control seasoning in your final dishes
- Save vegetable scraps like carrot peels, onion skins, and celery leaves in your freezer
- Try using a slow cooker on low for 8 to 10 hours as a hands-off alternative method
- Freeze stock in ice cube trays for small portions and 2-cup containers for recipes
- Always use cold water when you start, as this helps draw out flavors more effectively
- Keep the temperature consistent throughout the cooking process
Knowing how to simmer chicken stock opens up a world of delicious meals. Cool your stock quickly in an ice bath. Refrigerate it overnight, then remove the solidified fat. Freeze it in portions that fit your cooking style, so it’s always ready.
Common Mistakes to Avoid When Simmering Stock
Making chicken stock at home needs careful attention. Knowing common mistakes helps you make a better stock. You must learn how to simmer right and avoid mistakes that hurt flavor and clarity.
This section will show you the big mistakes that catch many cooks off guard. It will also teach you how to avoid them.
Temperature Control and Boiling Pitfalls
One big mistake is letting your stock boil instead of simmering gently. Boiling makes the stock cloudy and greasy. It also breaks down proteins too fast, scattering them everywhere.
To simmer right, keep the temperature between 180 and 200 degrees Fahrenheit. You’ll see just a few gentle bubbles. The rest of the surface should be calm.
To check the temperature, use a meat thermometer. Keep your burner on the lowest setting. If your stove gets too hot, use a flame diffuser.
- Use a thermometer to monitor temperature consistently
- Adjust your burner to the lowest effective setting
- Apply a flame diffuser for even heat distribution
- Avoid leaving stock unattended during cooking
Skimming Techniques for Crystal-Clear Stock
Skimming the first 30 to 45 minutes of cooking is key. Foam and scum rise to the top. They make the stock cloudy and slightly bitter.
Use a fine-mesh skimmer or slotted spoon to remove the foam. Work slowly and carefully. Add cold water if the foam gets too thick.
| Common Mistake | Why It Hurts Your Stock | Correct Approach |
|---|---|---|
| Skipping the skimming step | Foam dissolves back into liquid, creating cloudiness | Skim frequently during first 30-45 minutes |
| Adding too many vegetables | Bitter or overly sweet flavor overwhelms chicken notes | Use 2-3 carrots, 2 celery stalks, 1 onion per batch |
| Using strongly flavored vegetables | Bell peppers and cabbage dominate the taste | Stick to carrots, celery, and onion |
| Frequent stirring of stock | Agitation clouds the liquid throughout cooking | Stir only occasionally during simmering |
| Covering the pot completely | Traps off-flavors and creates condensation buildup | Leave pot uncovered or partially open |
| Rushing the cooling process | Temperature stays in danger zone too long | Cool in ice bath before refrigerating |
Avoid other common mistakes too. Don’t stir your stock too much. Keep the pot uncovered or partially covered. And don’t rush cooling, as it can lead to bacteria.
By mastering these techniques, your homemade chicken stock will be top-notch. Your stock will be clear and flavorful, making every dish better.
Conclusion
You now know the secrets to making great chicken stock. Simmering for 3 to 4 hours is perfect for basic stock. For more gelatin and nutrients, simmer for 6 to 8 hours. This way, you get the best flavor without too much effort.
Understanding the science behind simmering makes stock-making easier. Collagen breaks down slowly in gentle heat. This keeps your stock clear and flavorful.
Your needs determine how long to simmer. The type and size of bones matter. Whether you’re making Asian soups or French sauces, adjust your time. Keep the temperature steady and skim the surface for clear stock.
Stock-making is a valuable skill. Your patience pays off with a versatile ingredient. Use it in soups, risottos, or sauces. Homemade stock tastes better and is healthier than store-bought. Freeze it for easy access all month.